Brick Fireplace Makeover
I’m so excited to share with you all the “how-to” details on my recent brick fireplace makeover! This project does come with a bit of a mess, but it’s so inexpensive and delivers such a “big impact” transformation, that a little extra clean up is certainly worth it.
The 4 issues I wanted to solve:
Get rid of the deep joints between bricks.
Change the color to white.
Update the fireplace doors with a screen.
Change the stain color on the wood mantle.
Fortunately, I had done this project once before on a much larger scale at our Lavall Woods home, so I felt comfortable jumping right in.

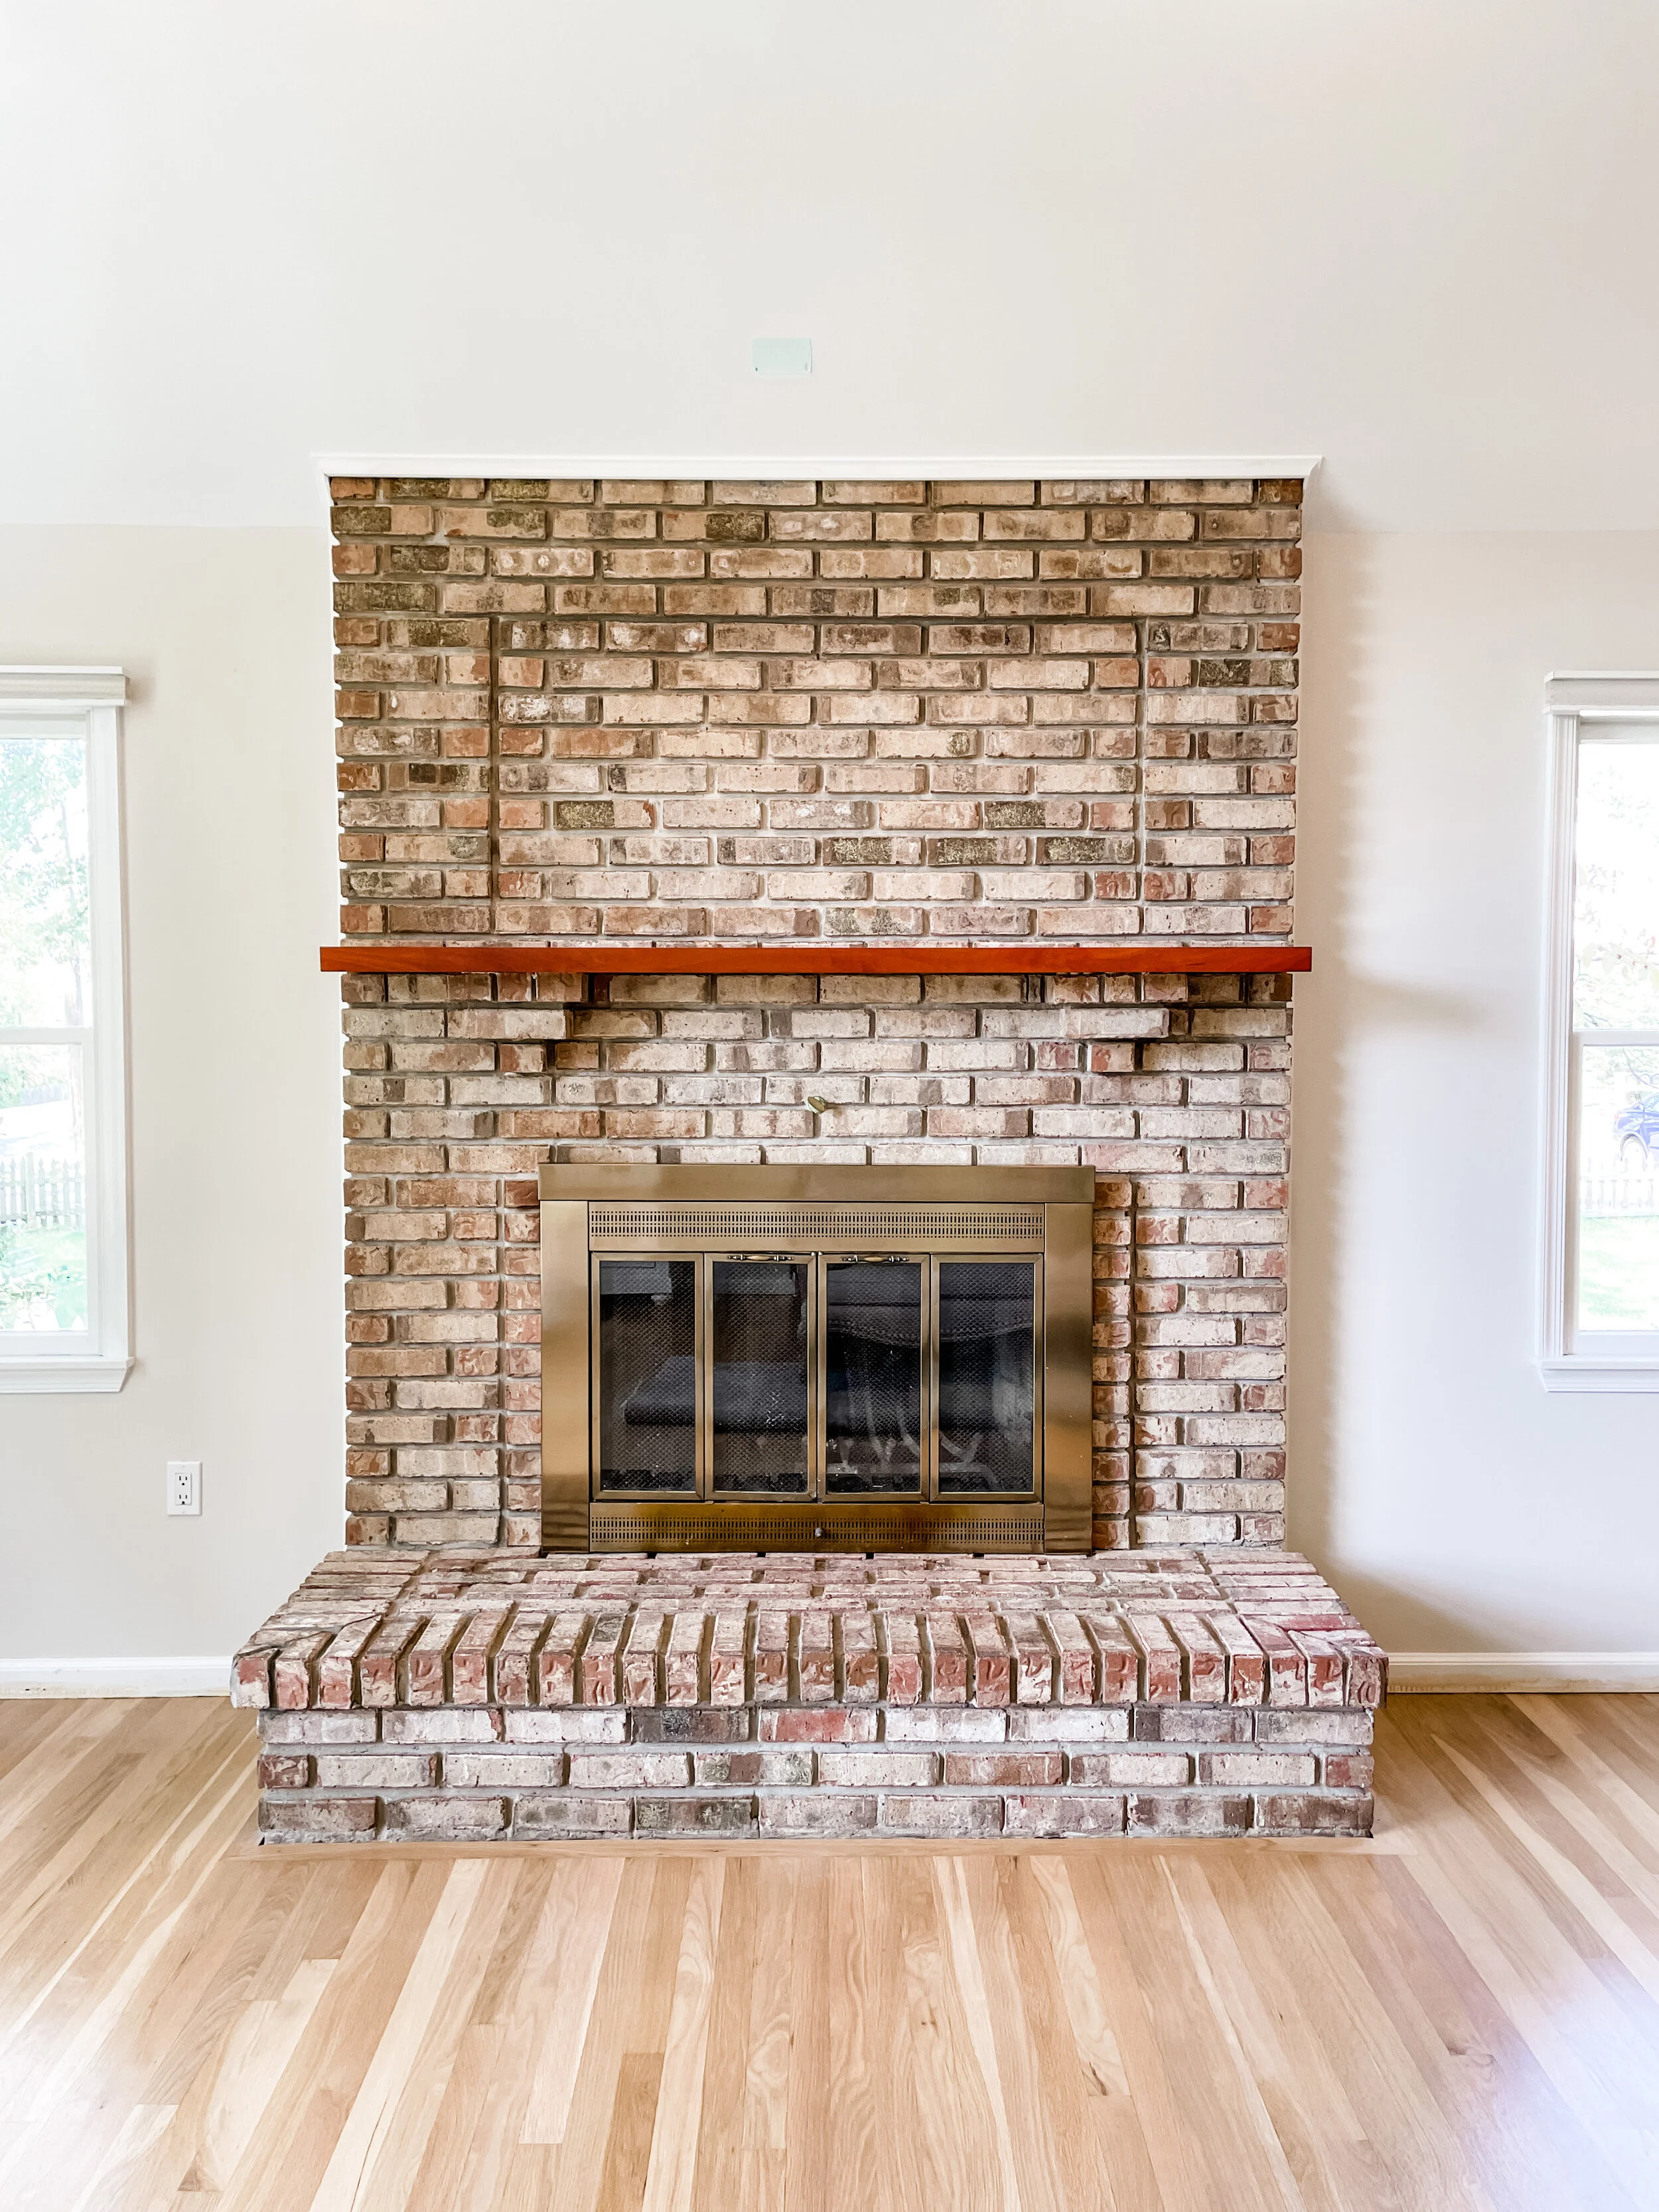
Corner brick prior to repair.
Before I started any resurfacing on the fireplace, we had a number of repairs to address which were discovered during our home inspection a few months prior. The final inspection report included a crack in flue, both of the caps on the top of the chimney were missing, the flashing needed replacing and a corner brick on the hearth was hanging on by a thread and was reattached.
Supplies:
White Paint (Oil-based)
Paint Roller
Water
Step 1 — Prep the fireplace.
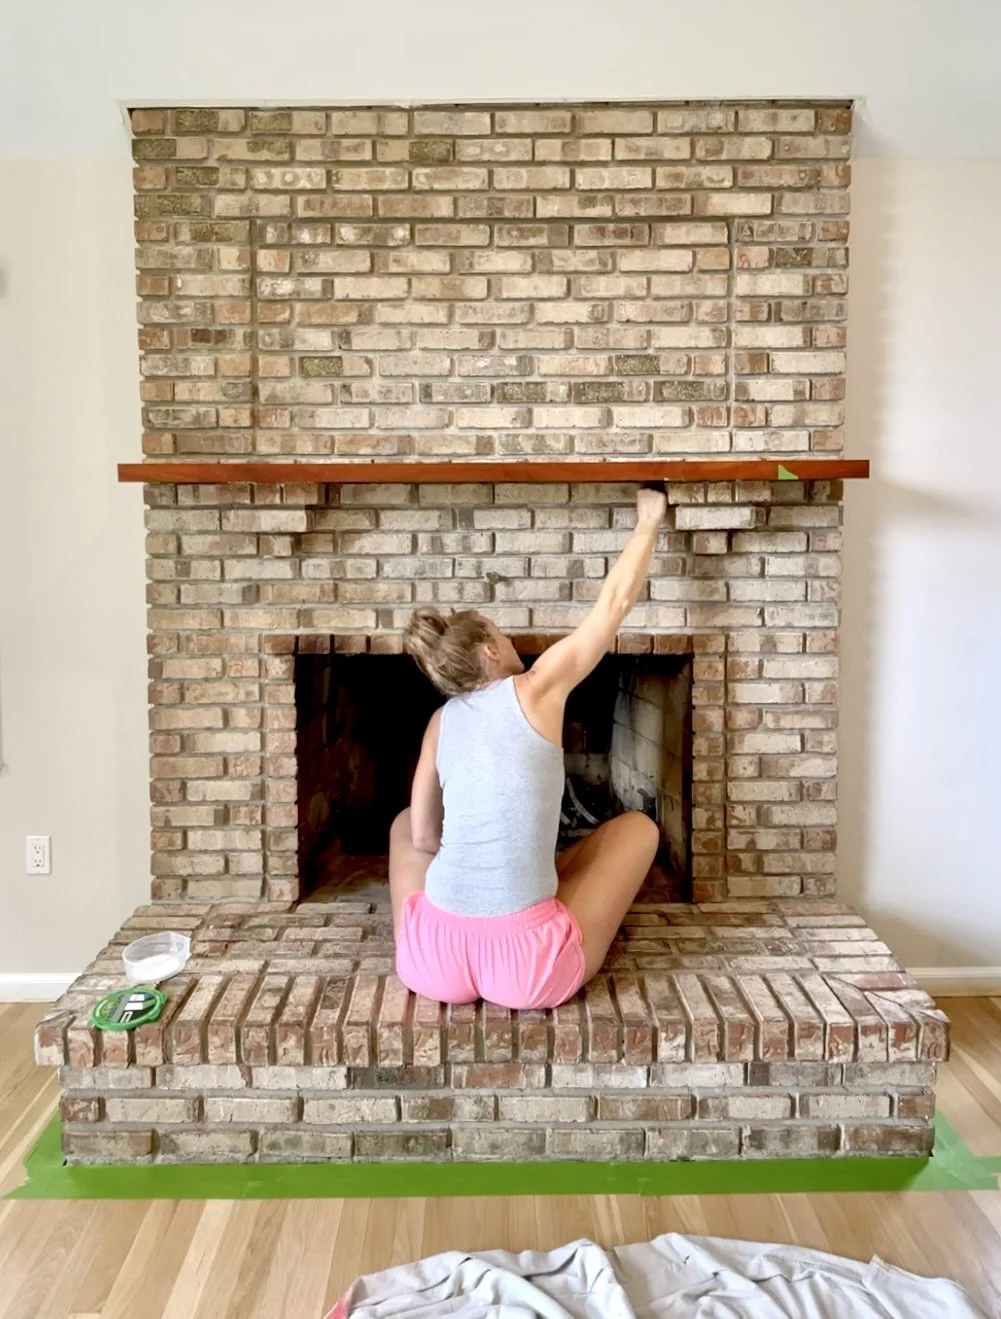
Start by cleaning your brick. If your brick is in good condition, you can probably get away with just a with a broom and shop vac. If you have brick that’s in need of a deep cleaning, check out this article by the Home Depot. The article covers multiple ways to clean both interior and exterior brick. Make sure to get up all the dust, debris and loose ash before applying any mortar.
Lay out drop cloths and tape off the floor and walls adjacent to the fireplace to prevent any damage to those surfaces. Once you are prepped, you’re ready to dive in!
Step 2 — Mix the mortar.
I wanted to fill the deep joints in between the bricks, so I chose to use a tile and wall mortar to achieve a more leveled surface. The good news is this stuff is suitable for use on bricks too. And because I wanted my fireplace to be white, I selected a white tile and mortar to get that base color I wanted.
It’s really important during this job that the consistency of the mortar is just right in order to have a successful application onto the brick. Follow the instructions on the bag for official guidance from the manufacturer. In the meantime, I’ll tell you my method below.
In a 5-gallon bucket, pour half a bag of the dry mortar and 2 gallons of water.
Carefully mix the mortar inside the bucket with an electric drill for mixing mortar and a mixing paddle drill attachment for 3 minutes.
Let mixture stand for 5 minutes.
Mix again for another 1 minute before checking the consistency.
You’re going to be aiming for a peanut butter like consistency to the mortar mixture. You’ll know you’re in the right area when the mortar stick to the paddle attachment and doesn’t slide off easily and isn’t watery. Once you feel like you’ve got the right mix for the mortar, you are now ready to move on to the fun part!
Step 3 — Apply the mortar.
When applying the mortar to the fireplace, there really isn’t any fancy technique you have to mimic. At this point, it’s primarily about getting the feel for applying the mortar, applying it evenly and ensuring you’re staying consistent when working towards the look you’re going for.

You may have seen other DIY’ers use a piping bag to fill the joints in on their fireplaces. It is a useful technique when you’re mainly looking to fill the joints and leave the existing brick as is. I’ve tried the piping bag technique and I found it to be more work than what it was worth. Because I wanted to cover the surface of the brick, PLUS fill the joints, I didn’t need the precision that a piping bag would offer. My tool of choice: A baking spatula.

With the spatula, get a big dollop of mortar and spread it across the joint and brick. Fill the joint to the desired depth. Manage the coverage across the face of the brick by ensuring your staying consistent with the amount of mortar you spread across it. It helps to take a step back and look at the bigger picture as you go along.
I suggest working in small sections as you move along around the fireplace. Always start at the top and work your way down. Once you have a small area covered, I use my masonry float and tile + grout sponge to wipe off an excess mortar and ensure a smooth across the face.
Keep at this until your entire fireplace is complete! Once you have finished, remove the painters tape from the walls and edges.
Step 4 —
Let it dry.
You’ll be able to see a significant color change as the mortar begins to dry. Surprisingly, the white mortar goes on wet as a dull gray color and dries almost a pure white.
I like to let my mortar dry for at least 24 hours before I begin working on any final touches.
Step 5 — Paint.
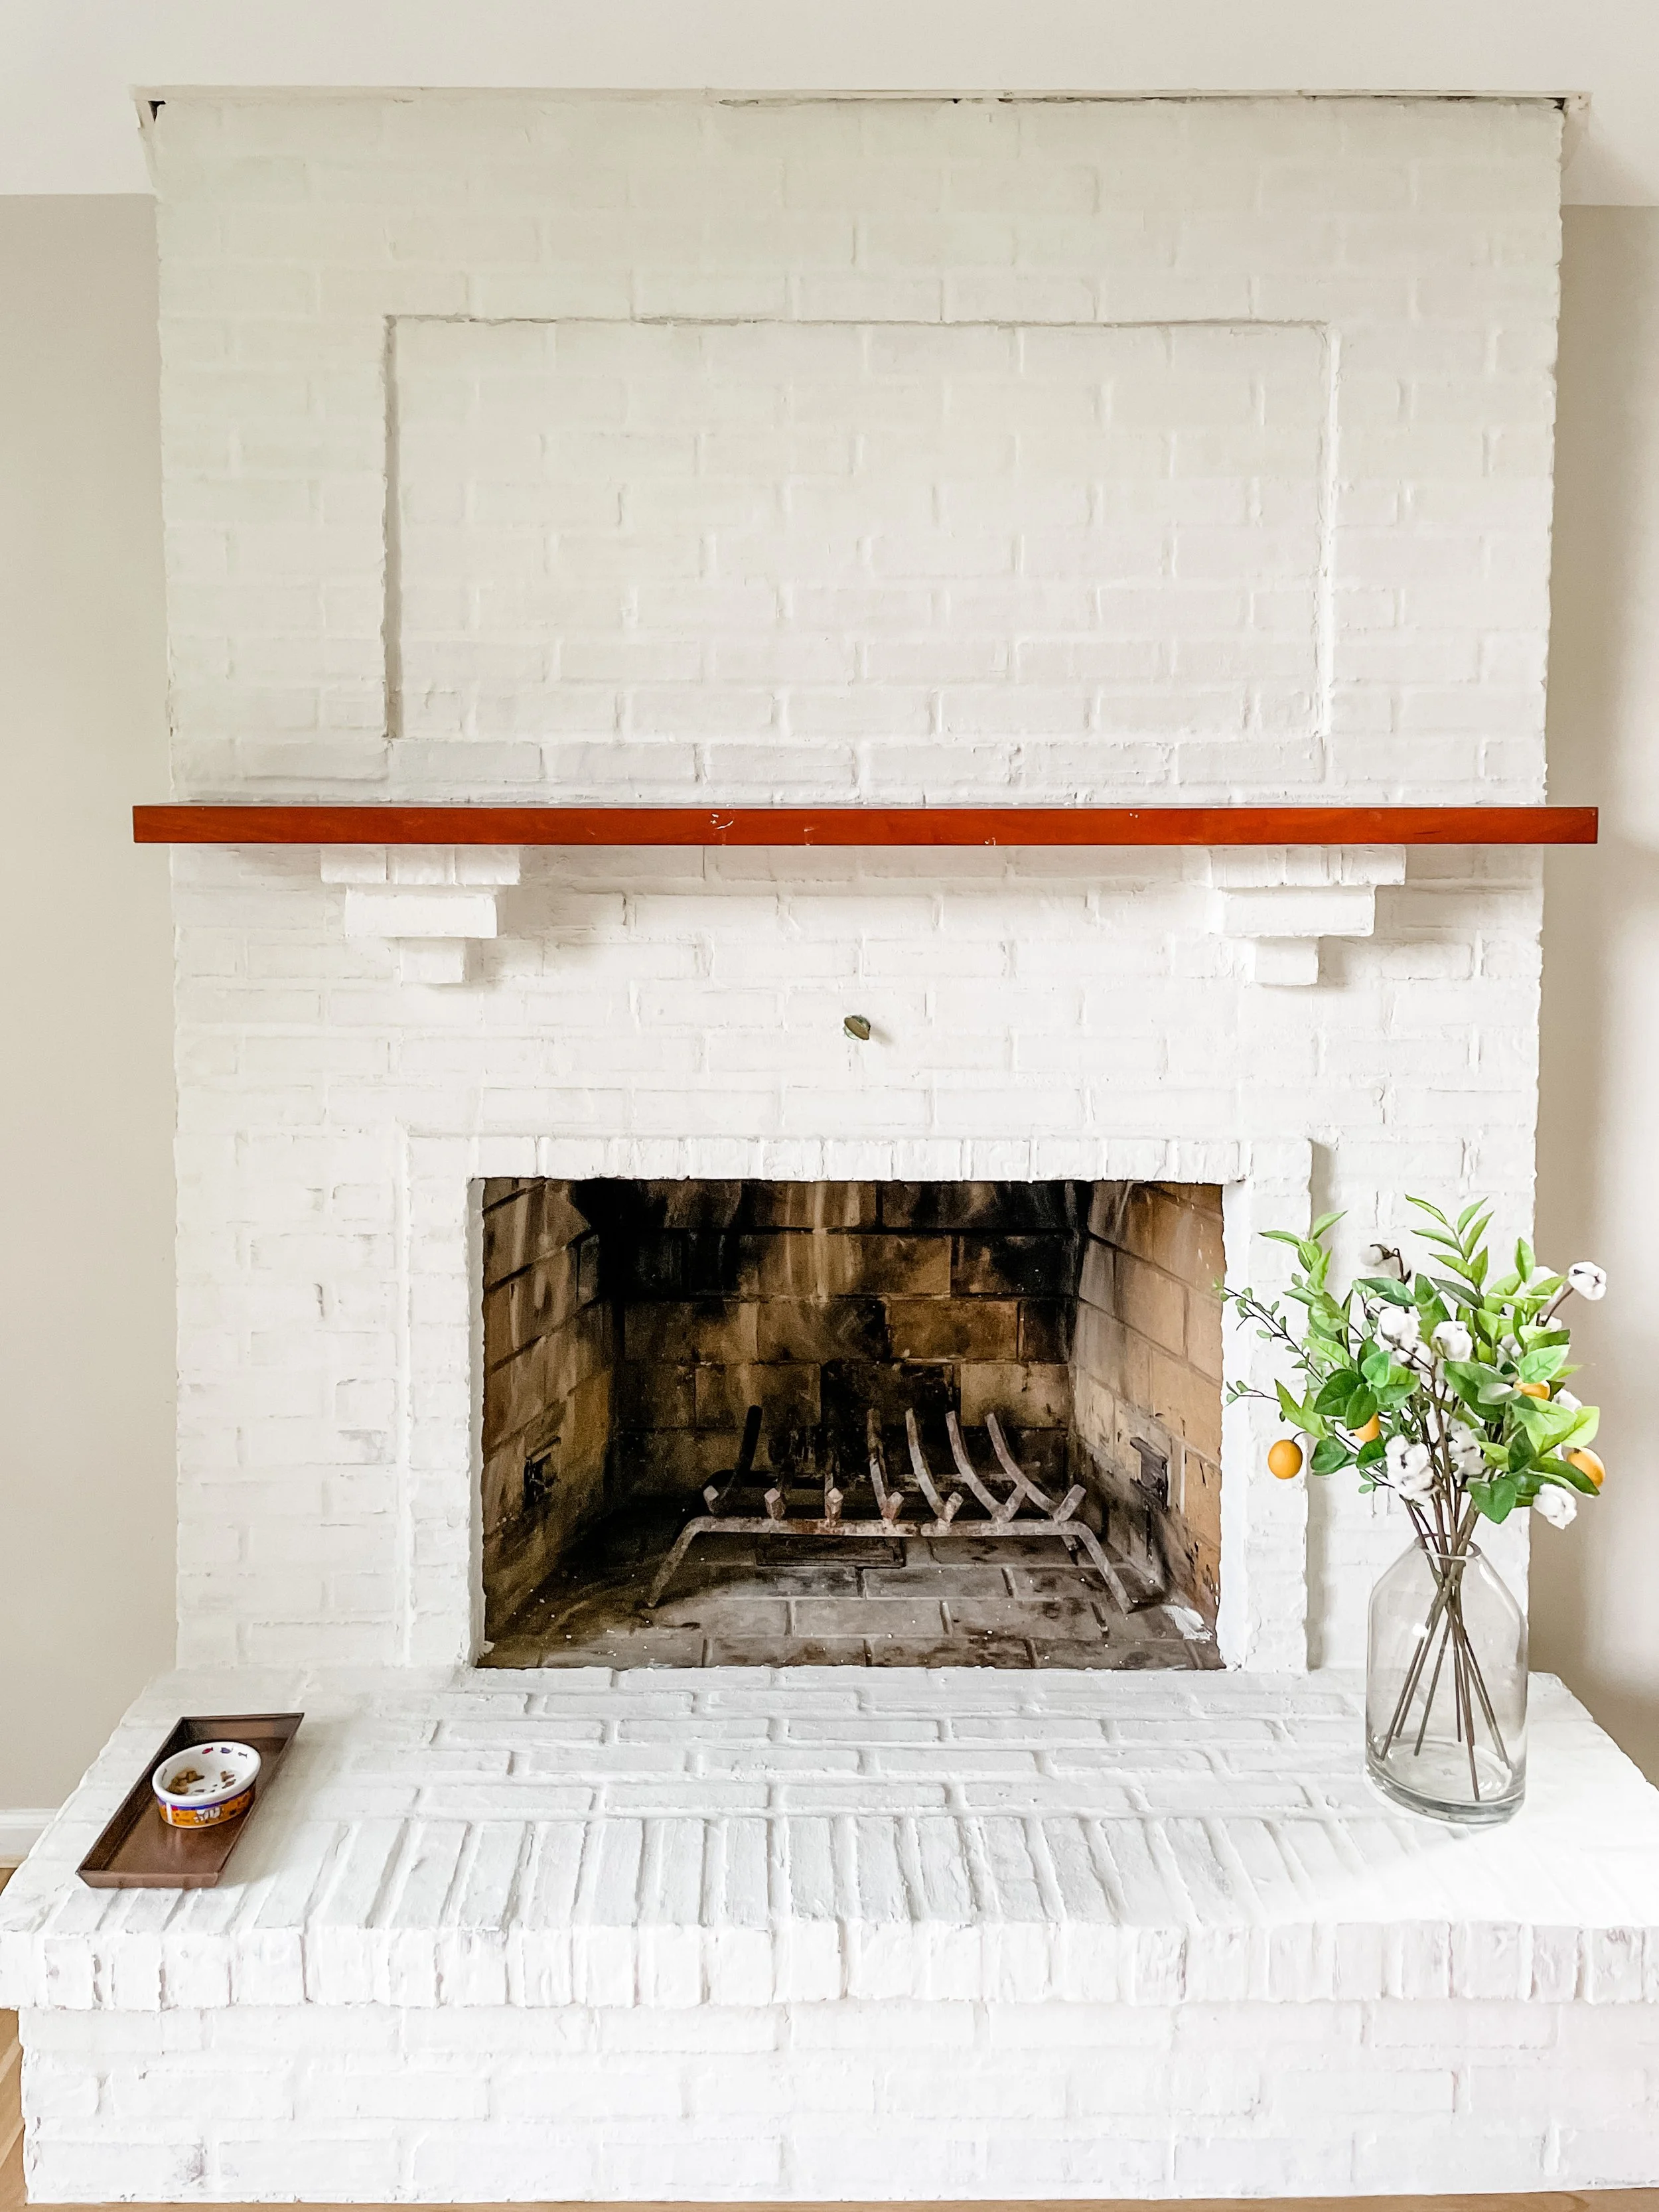
Before Paint
This final step was something I wasn’t intending on doing being as though I had used white mortar to resurface the fireplace. I thought the white mortar by itself would be enough. However, the longer I looked at the fireplace the more I began to realize how unhappy I was with the overall color not being a true white.
In order to fix that problem, I knew I was going to have to paint the fireplace. I wasn’t thrilled about it but there was no way I was going to live with it just “as is.”

I used a basic white paint and cut it with water. My ratio was close to 1 part paint plus 1 part water. I merely eyeballed the consistency before deciding I had it right. It’s important to make sure the paint and water mix isn’t too watery because you’ll have a very hard time applying the paint and it will make a HUGE mess when you roll it on with the paint roller. It will spray off of the roller EV-ER-Y-WHERE.
On the flip side, if the paint is too thick when you apply it, you are preventing the brick from being able to breathe because you are sealing all of it’s porous cracks and crevices. Brick is a type of material that needs the ability to breathe. In order to prevent any moisture from being trapped in it, which can cause much larger problems down the road if left unaddressed, make sure to water down the paint.
I wanted to ensure I didn’t over do the amount of paint I was using so I erred on the side of less is more.
I used a 4” foam roller to paint the entire fireplace. I know it sounds ridiculous but I find I have better control when using tools available in smaller sizes. In this project, it happened to be me favoring the 4-inch roller versus the 6-inch or 9-inch rollers.
After Paint
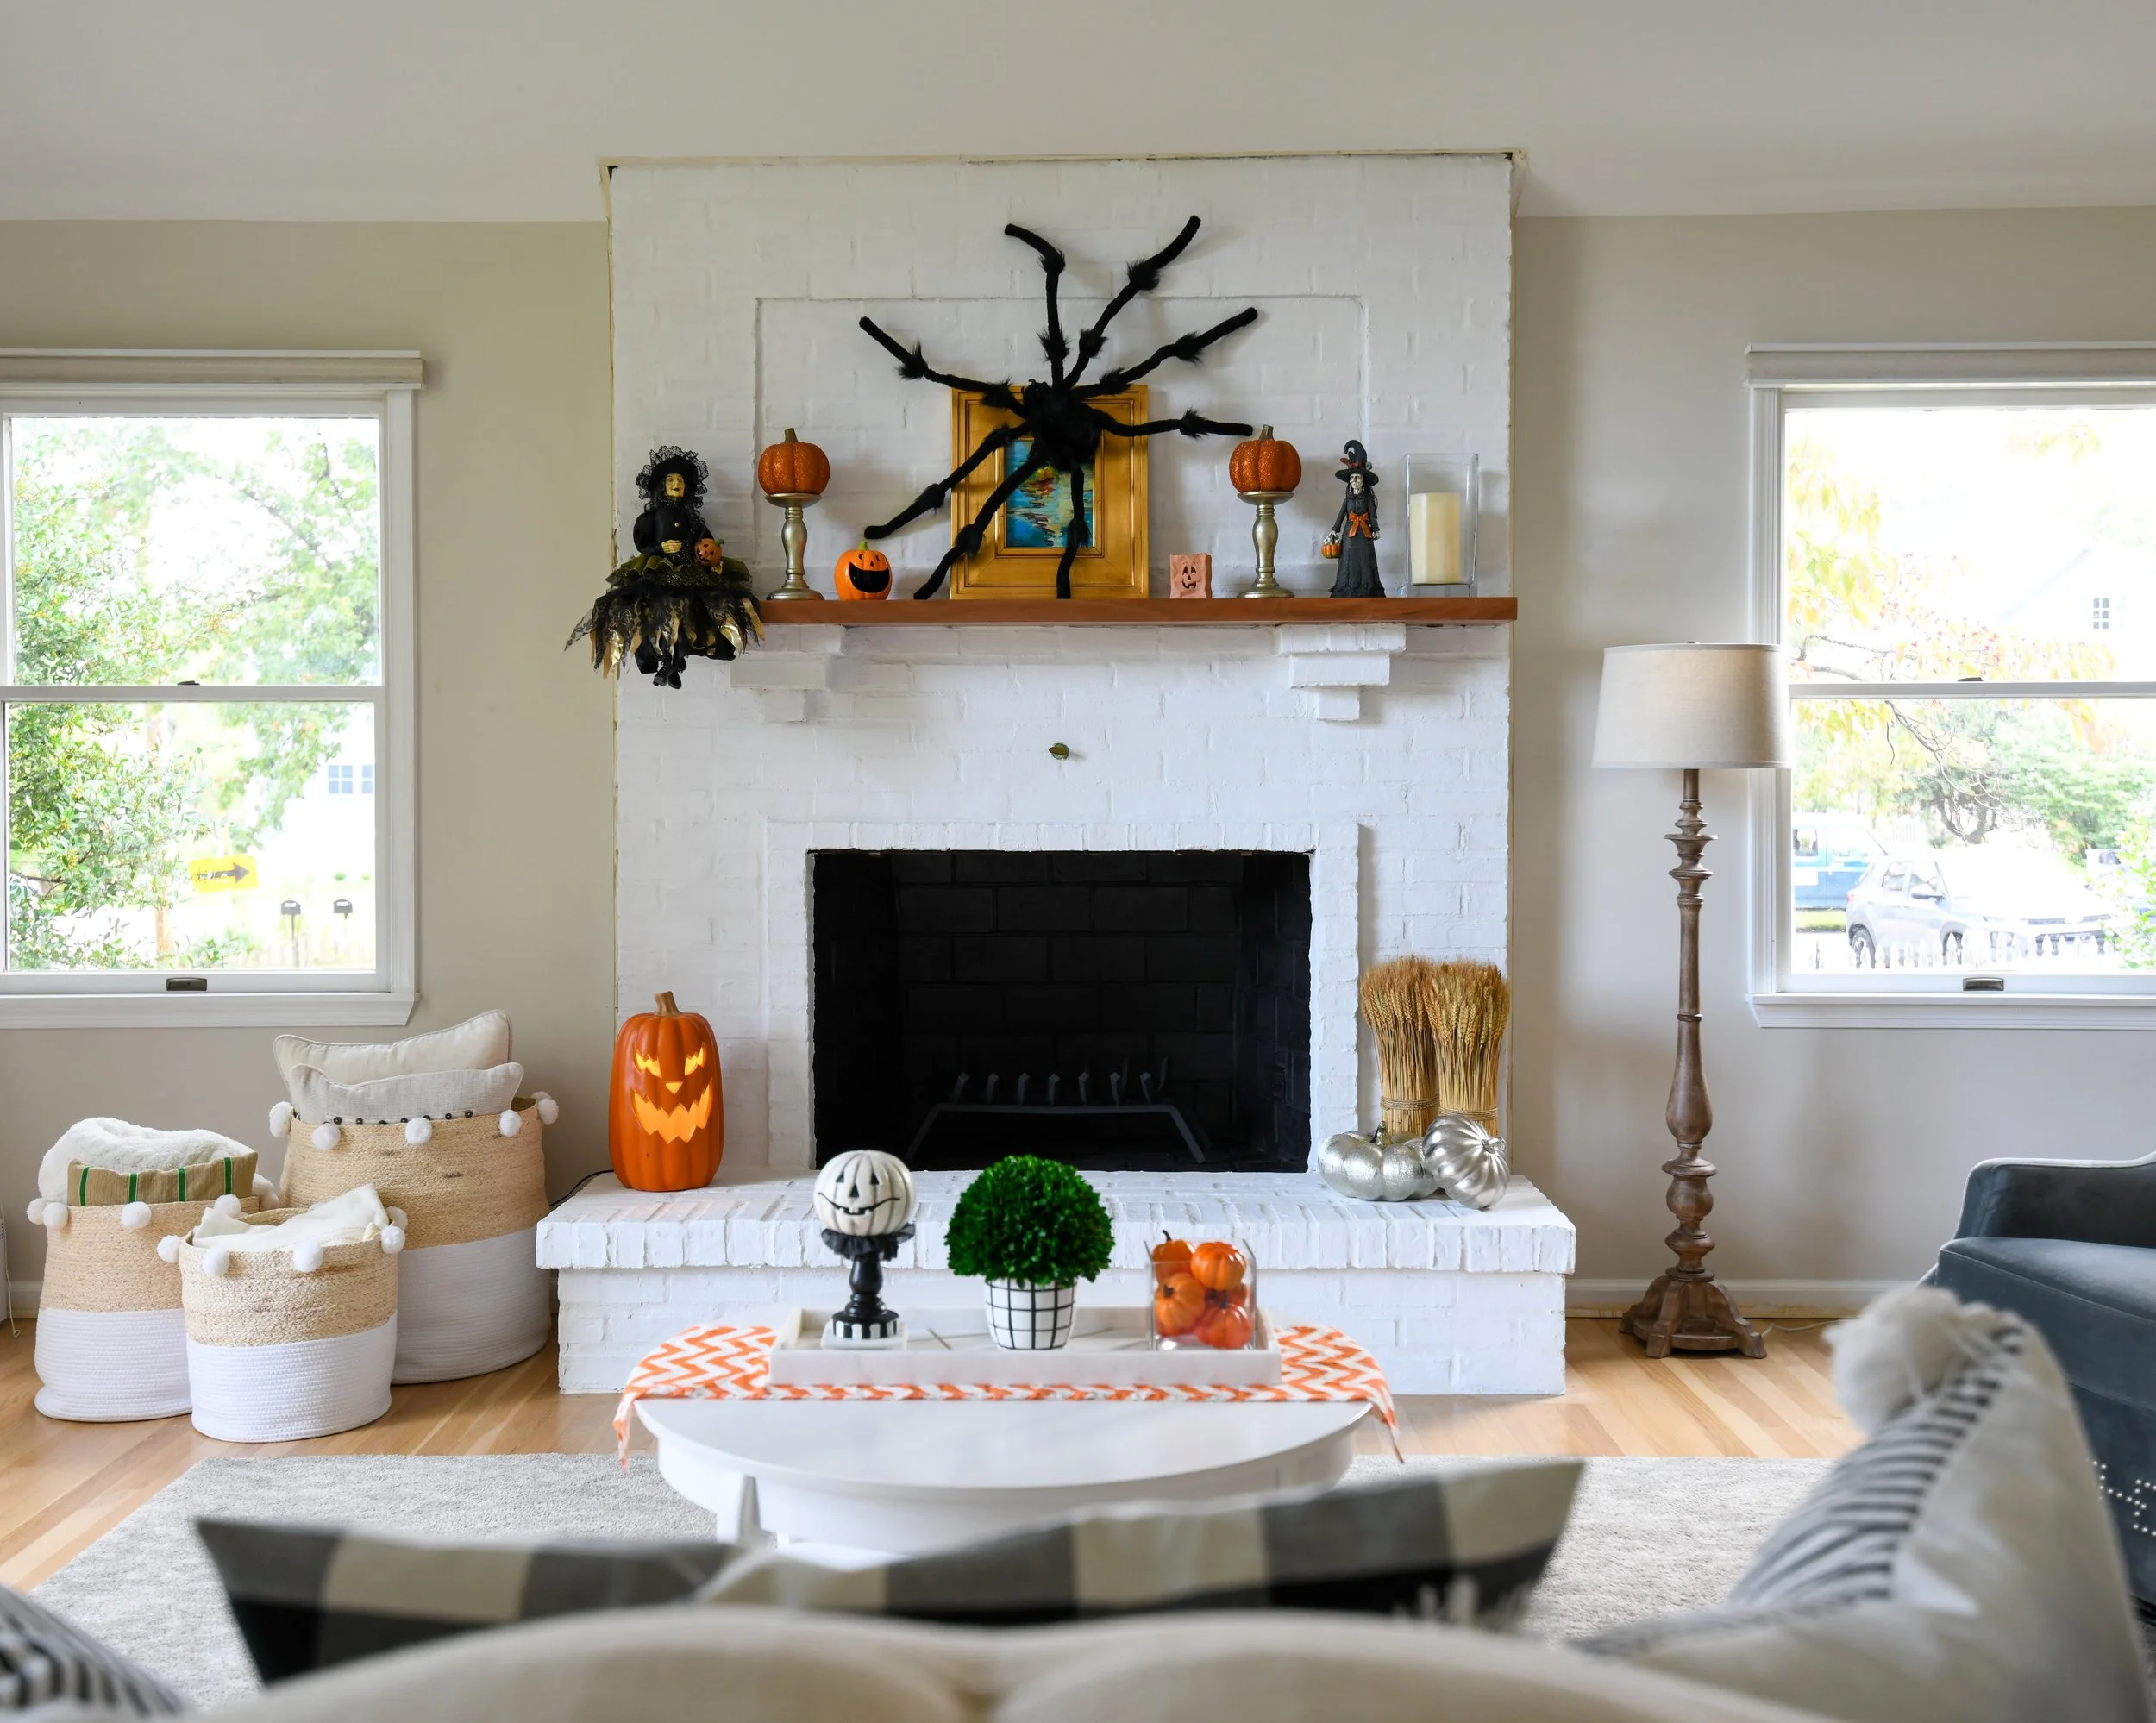
Step 6 — Paint the firebox.

Now that we had a nice, fresh fireplace to look at it only accentuated how awful the inside of our firebox actually was. I had a friend reach out and share with me that she painted the inside of her firebox black and loved it. Her fireplace was no longer functioning so she used a basic black latex paint which worked well for her. My situation was slightly different because our fireplace IS functioning and I would like to have a fire in it one day. I knew latex paint wasn’t going to be an option for this scenario.
I did some research and came across Rust-Oleum High Heat Paint and Spray Paint. It was the only paint I found that could withstand very hot temperatures without failing. It was not recommended for use in direct flame but I decided I’d be willing to take a gamble on it and try. I followed the directions on the back of the can to paint the inside of the firebox. And I used the High Heat Spray Paint to paint the grate a nice black color.
We have yet to have a fire in the fireplace since having redone the firebox so, unfortunately, I don’t have any feedback to share on the Rust-Oleum products and how they have faired. That said, I will say I was very happy with the application process and the way everything turned out. It was a clean product and didn’t have terrible fumes. The paint color is a very deep and true black. Aesthetically, it looks amazing.
Step 7 — Refinish the mantle.

Fortunately, I was happy with the existing piece for the mantle so I didn’t feel the need to do much work on it other than a basic sanding and sealing. I wasn’t a big fan of the stain color so I sanded the existing coat of poly and stain off of the wood. I used a 120 grit and worked my way up to a 320 grit.
After sanding, I wiped down the mantle with a damp cloth and let it dry. From there, I applied a water based polyurethane. I did not want the yellowing tint that an oil-based polyurethane would leave on the wood so I made sure to use the water-based option.
I applied 3 coats of polyurethane and let each coat fully dry before applying the next.
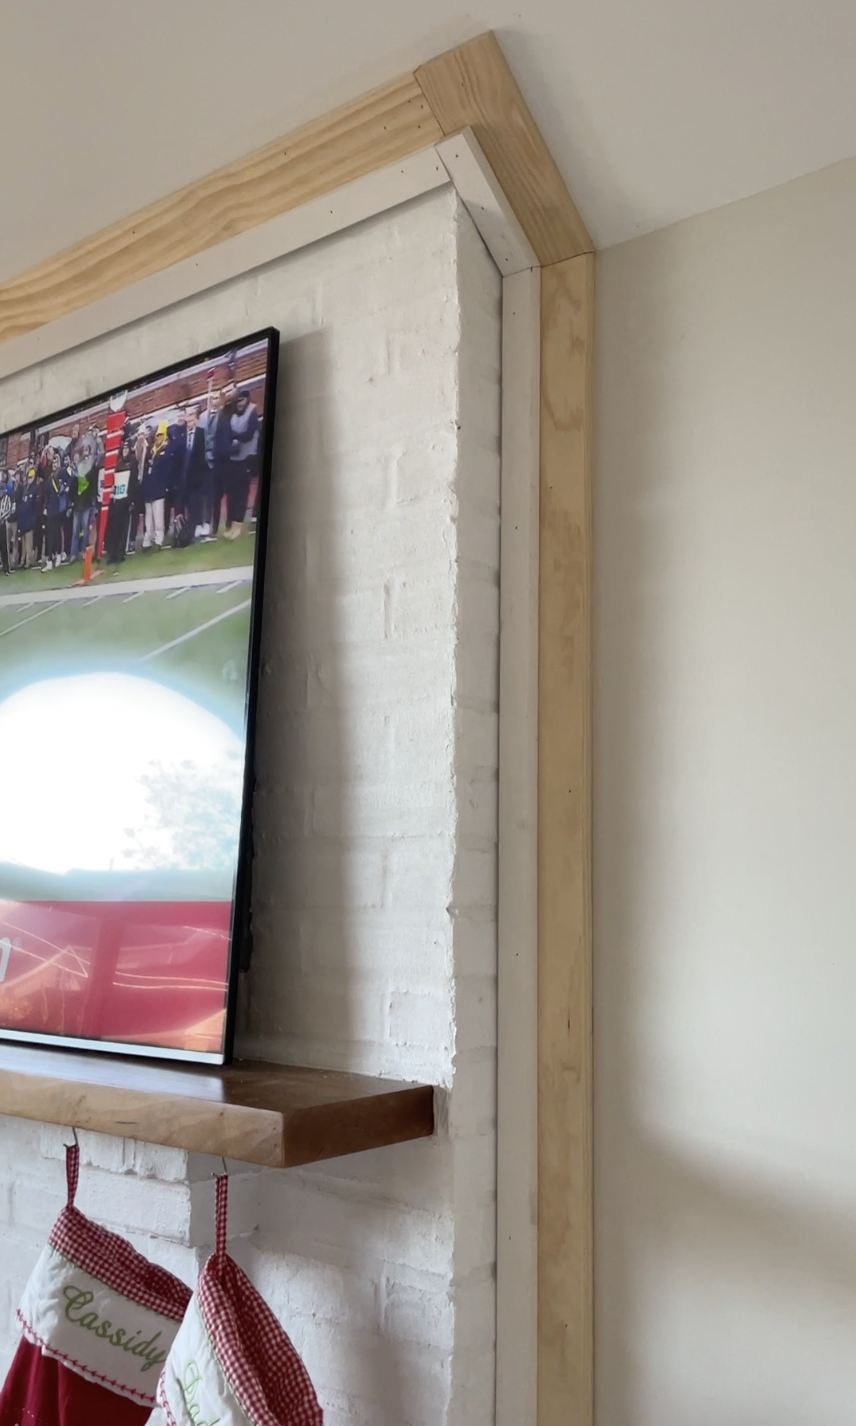
Step 8 —
Add the trim.
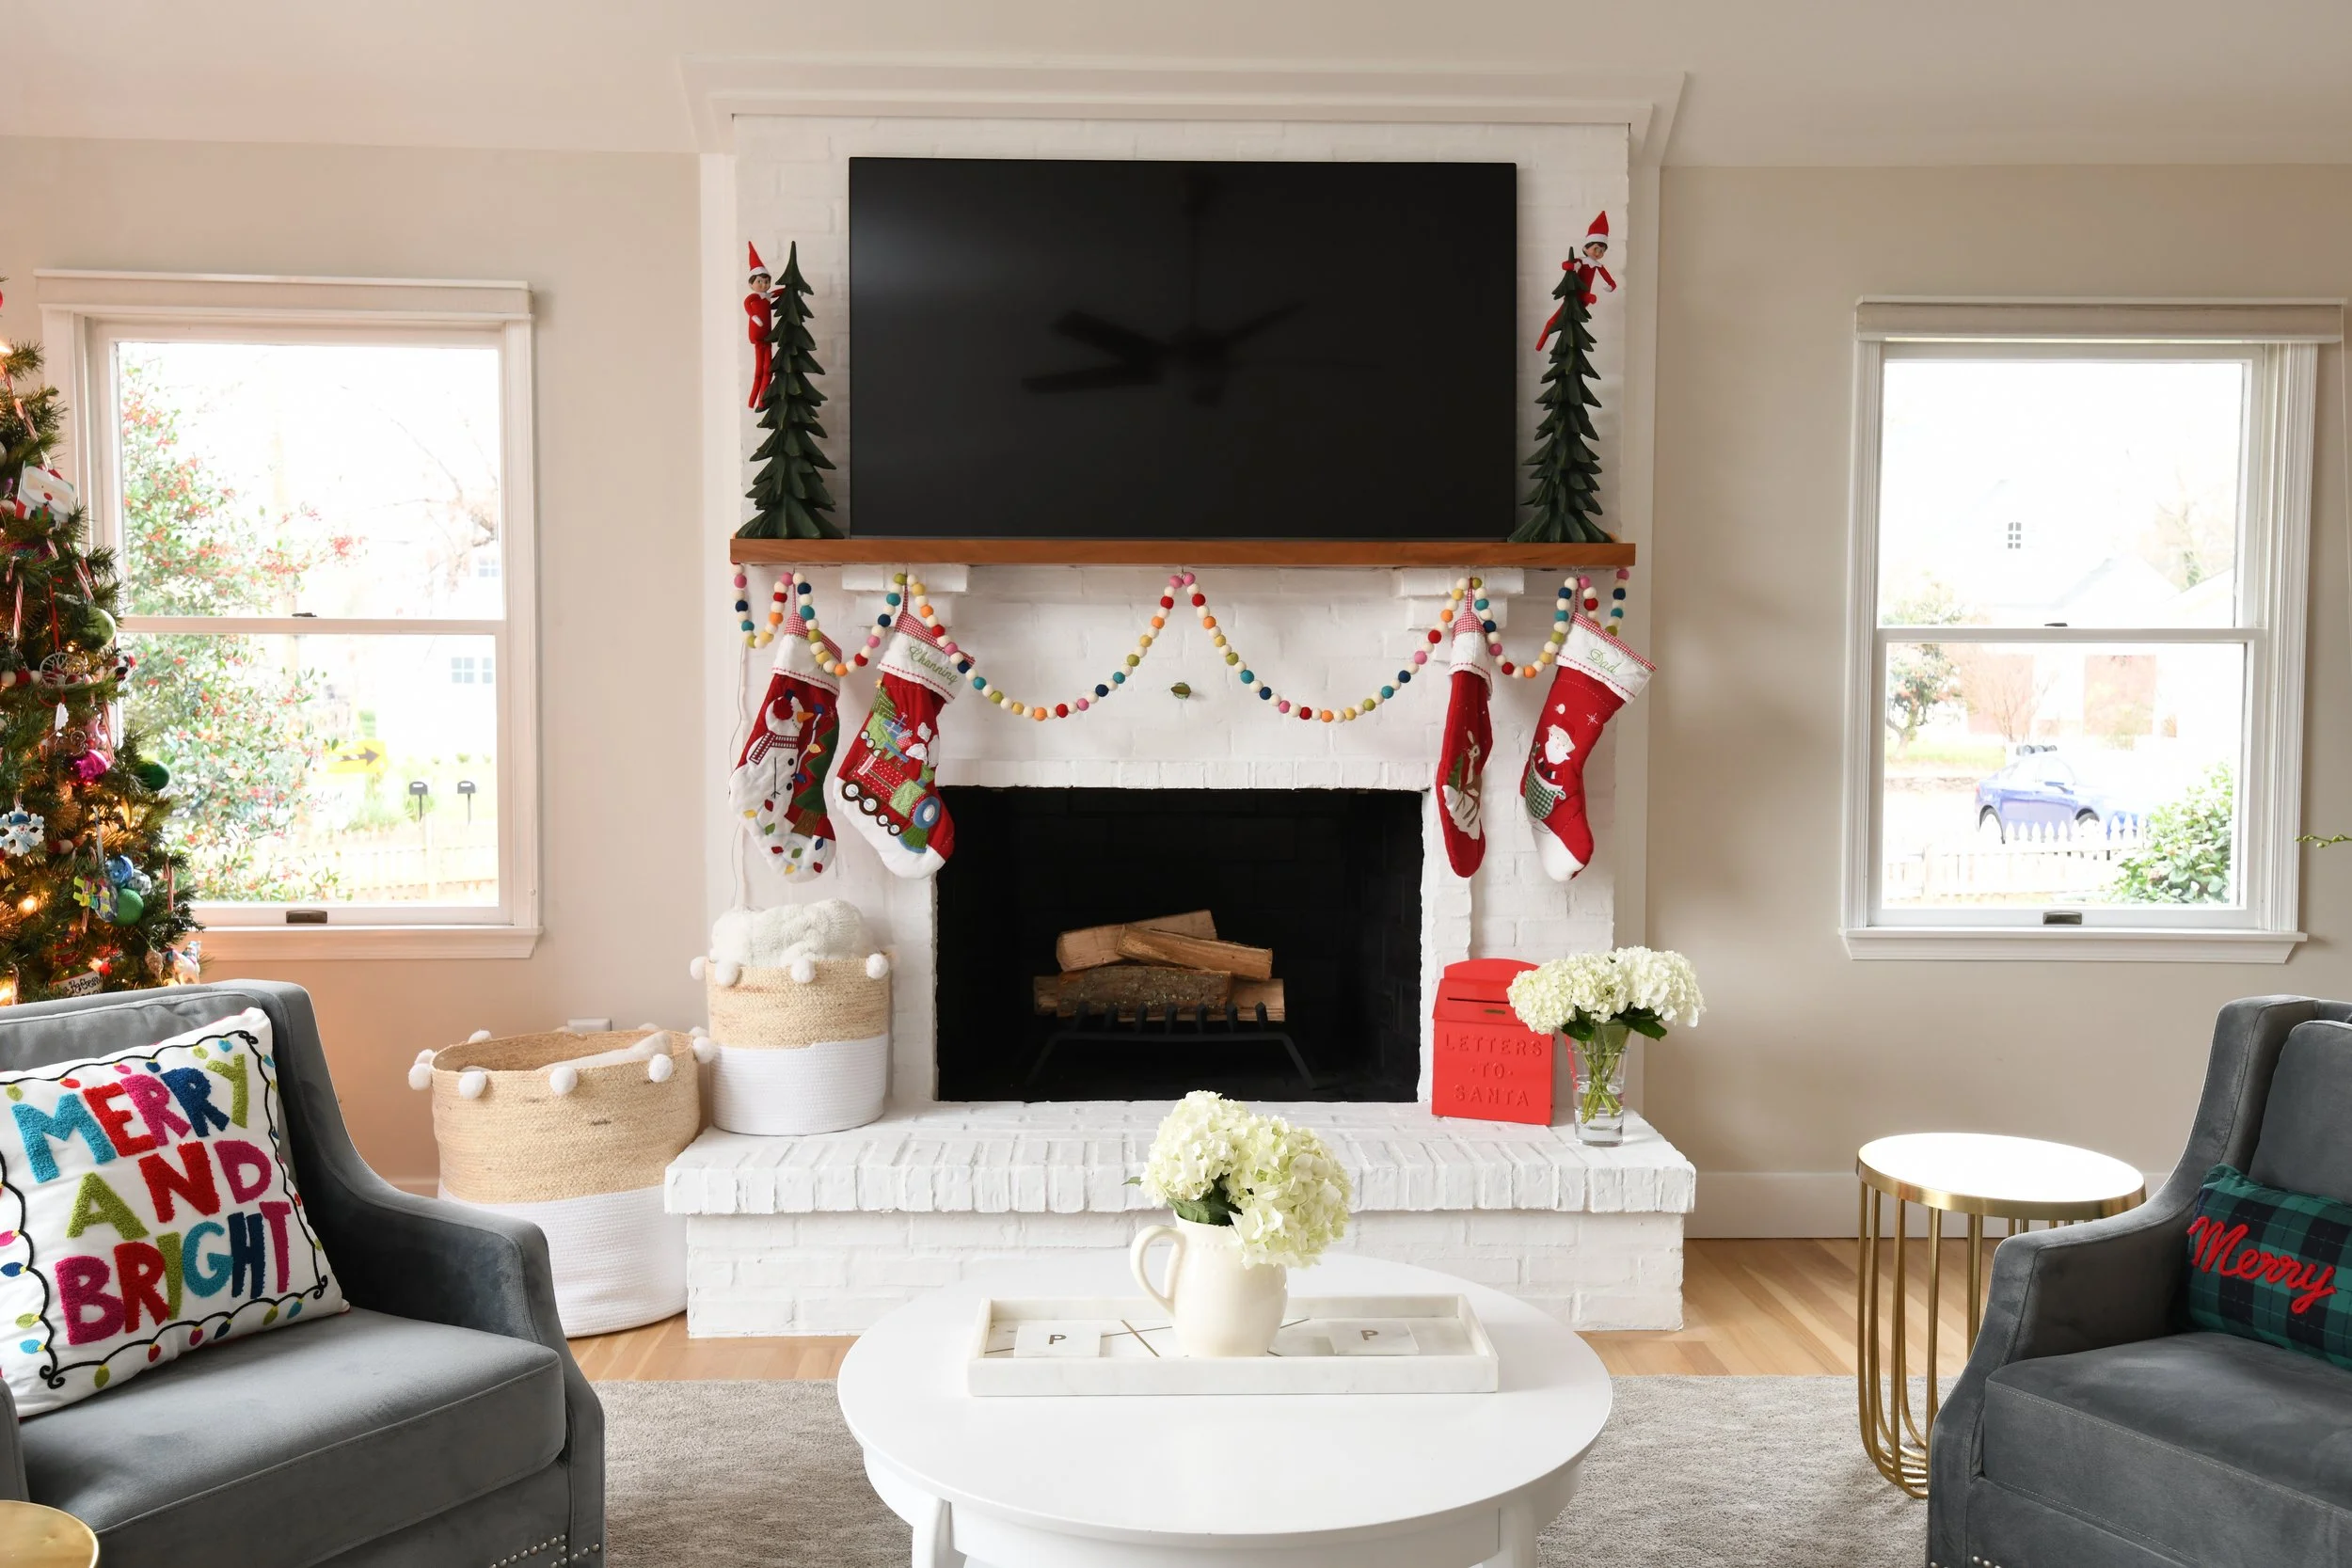
After finishing the fireplace, I added a basic trim that was a 1x4 stacked with a 1x2 around the perimeter of the brick. I finished the trim by painting it a white semi-gloss. It has now framed out the fireplace perfectly.
Look for a post in the future that is solely dedicated to trim work! It’s quickly becoming one of my favorite things to do.
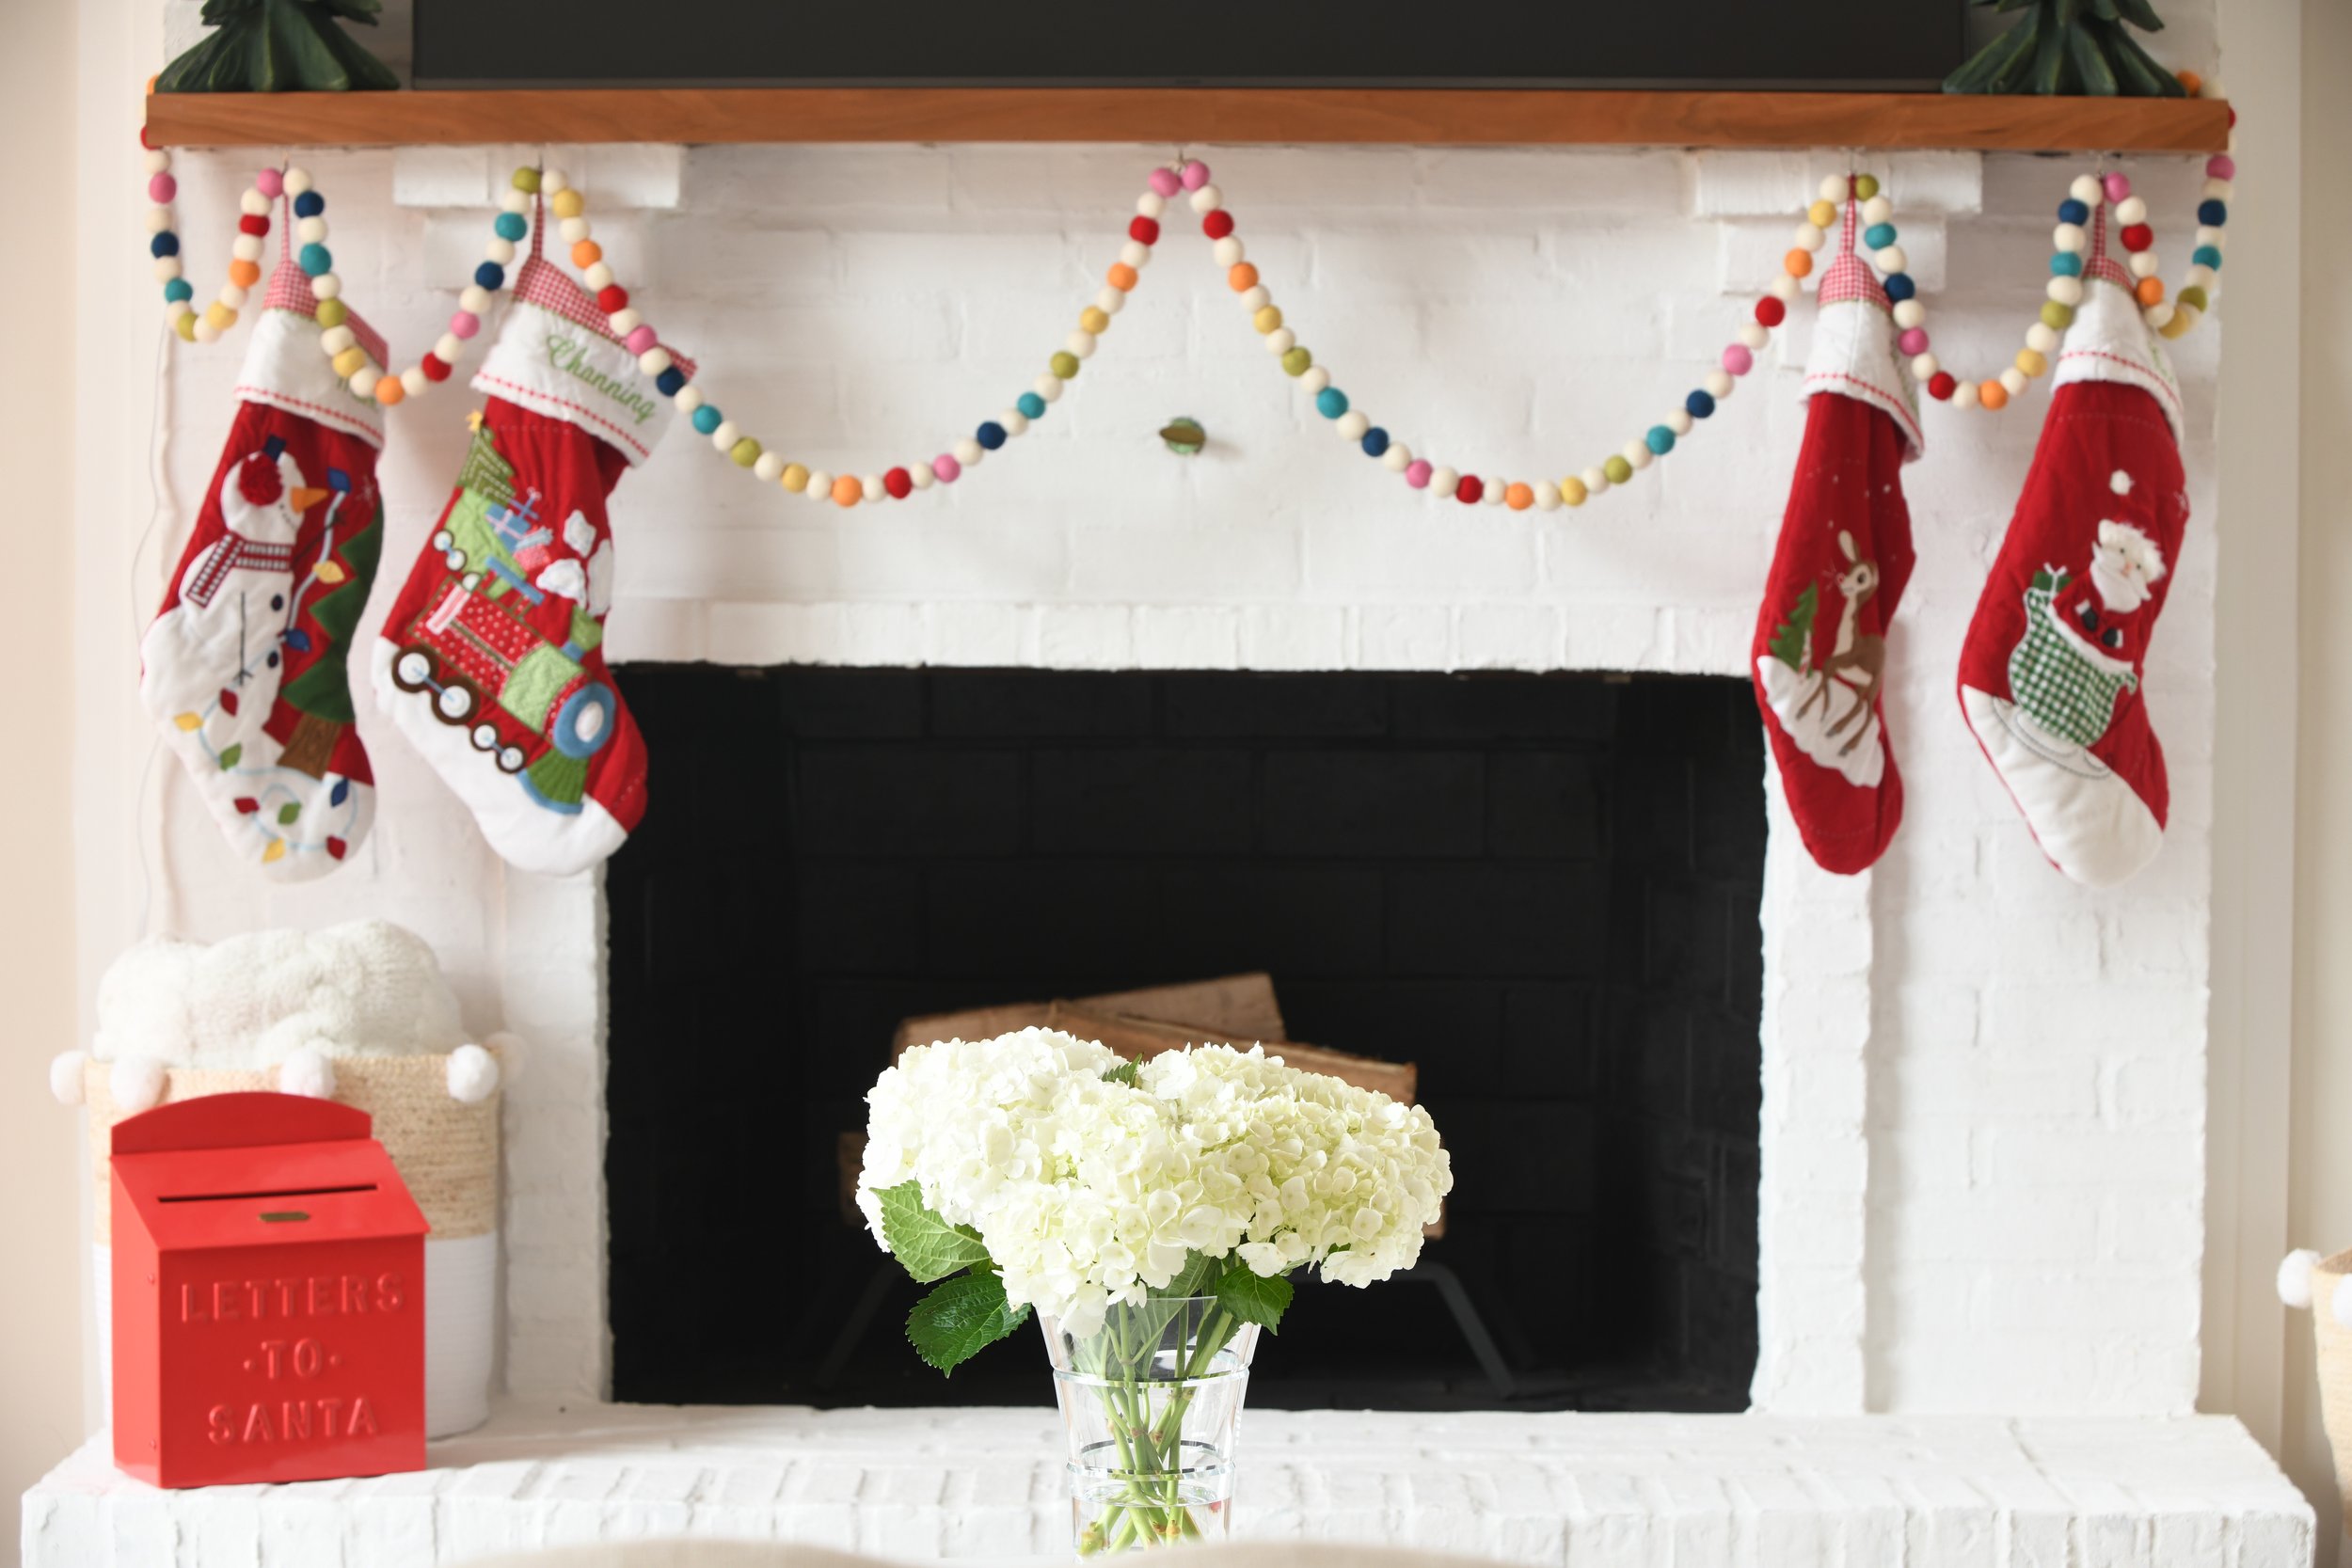
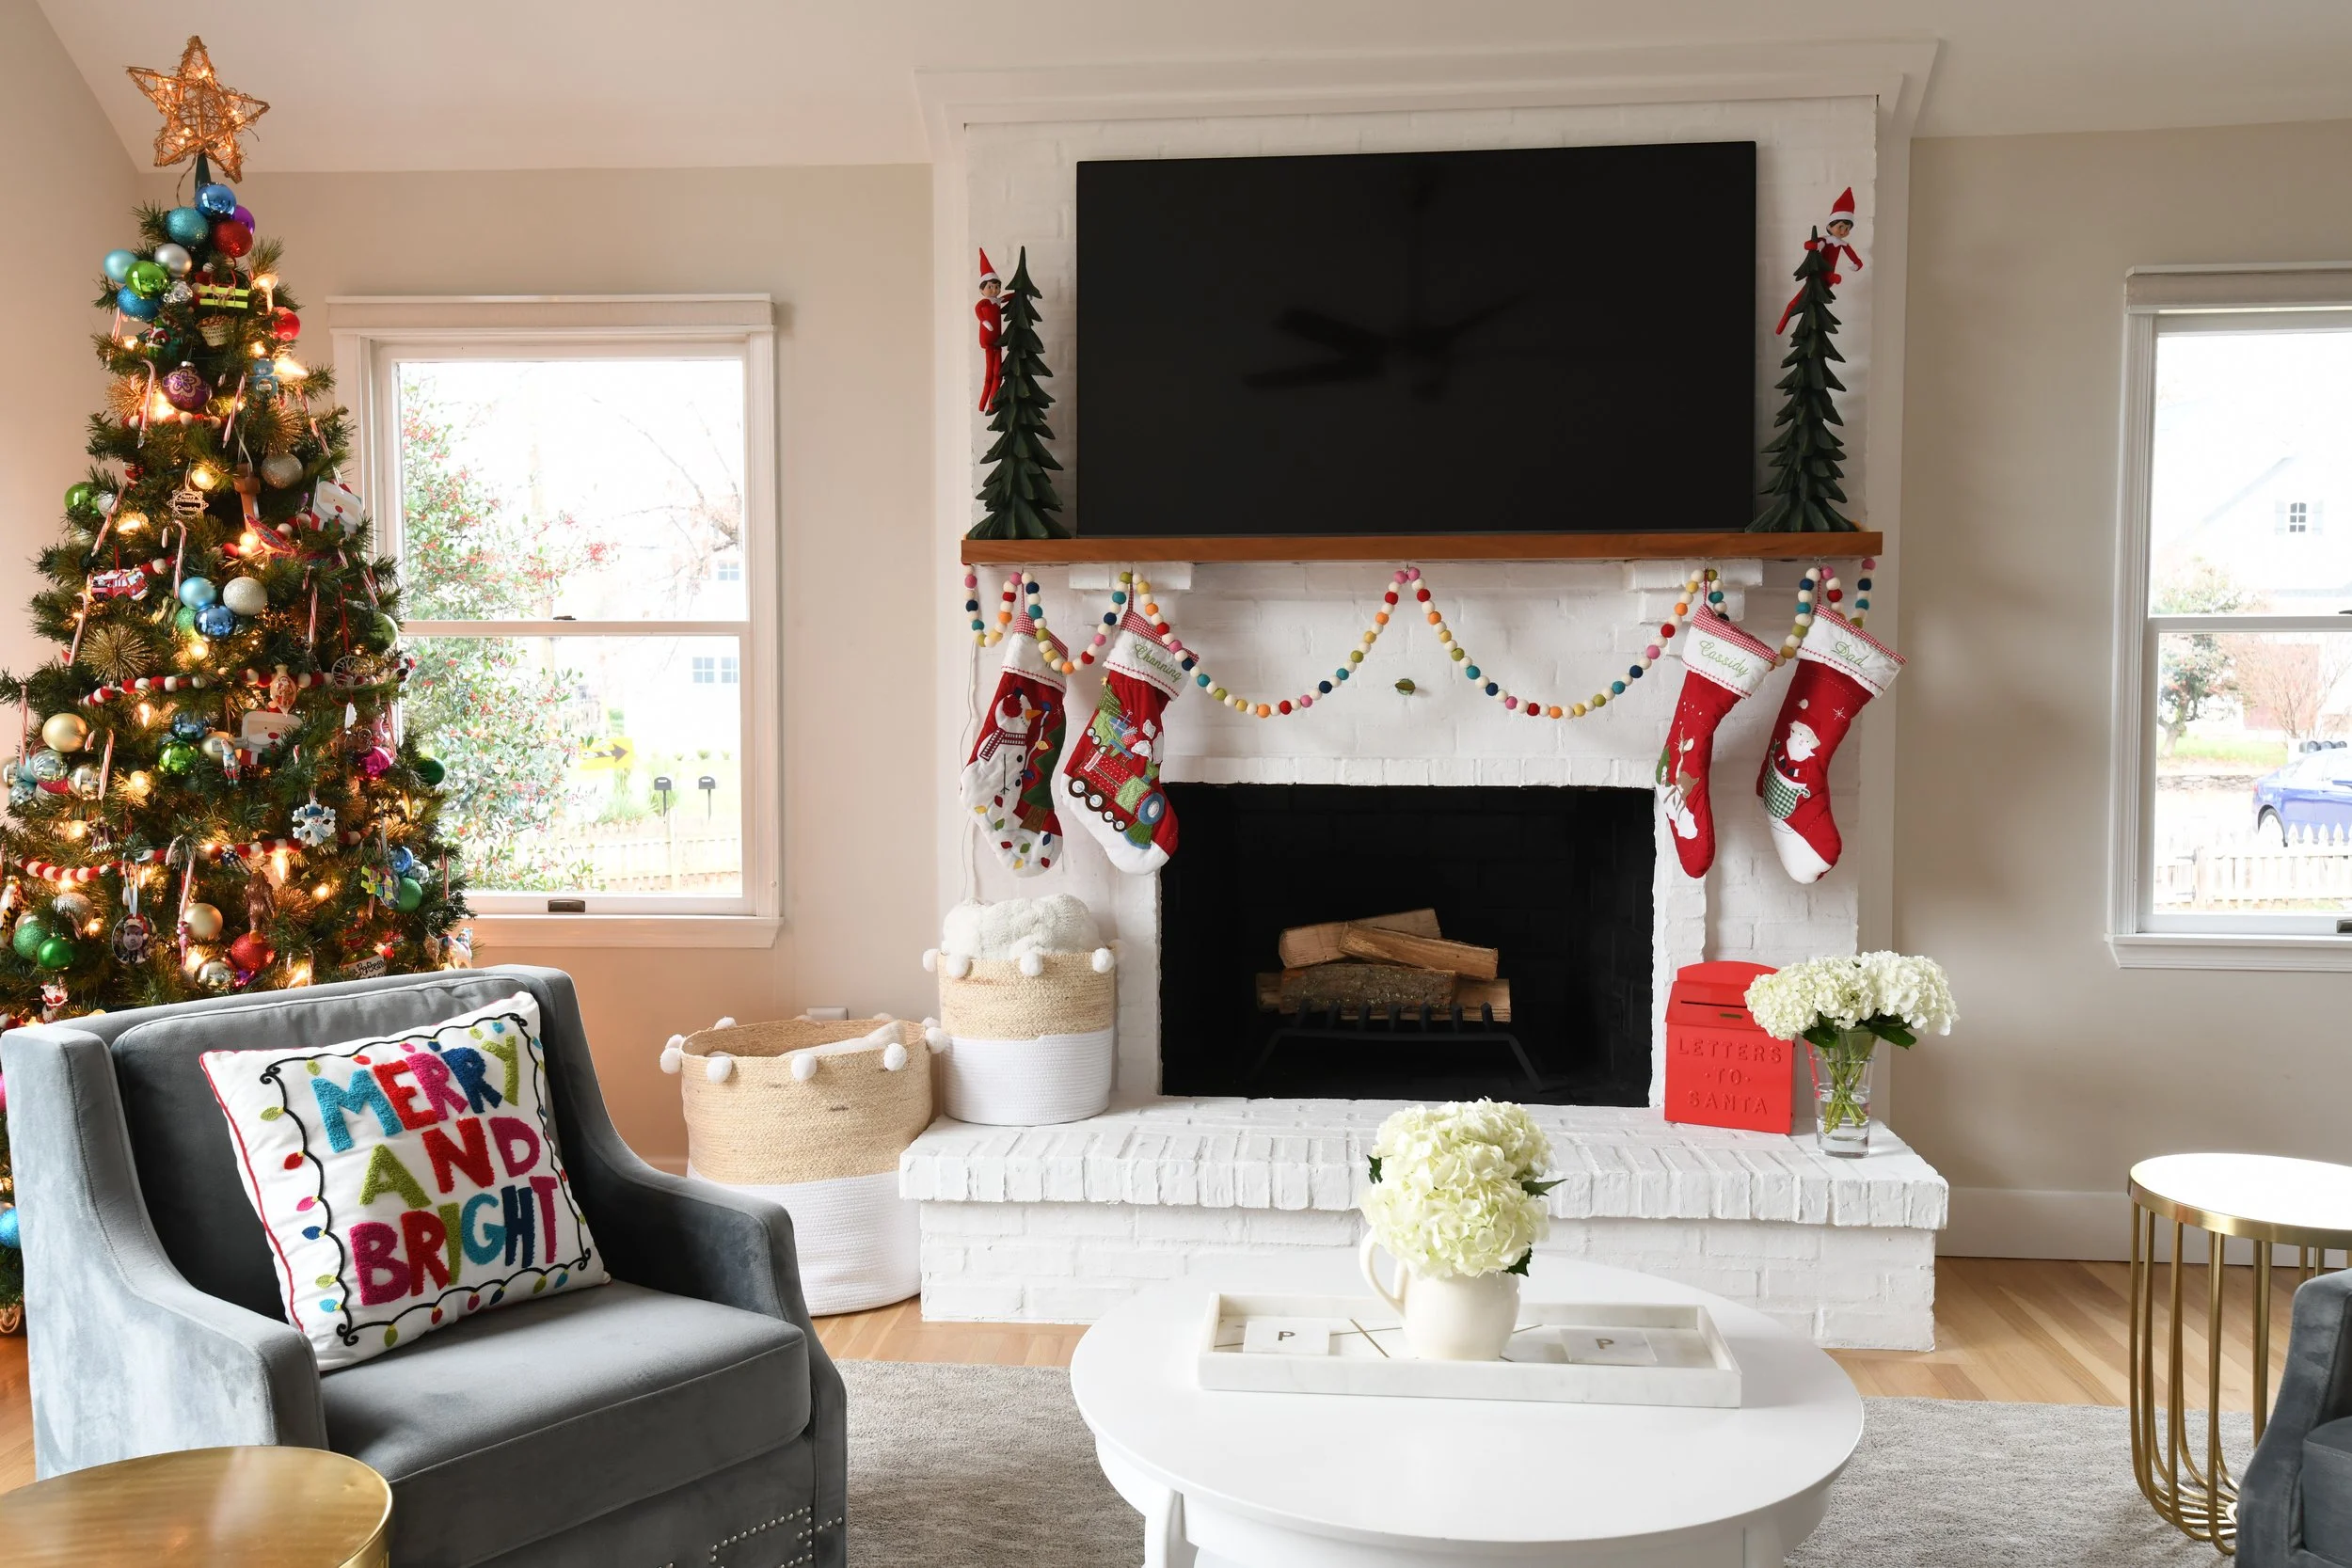
When it’s all said and done…
Be proud of yourself. When you look around in your home and that gorgeous fireplace area catches your eye, be proud because YOU did that. YOU made that. YOU. It was all YOU. ♡